Meta Copy Doc Generator
Generate localized Google Docs from one template using spreadsheet data. A separate, fully populated document for every locale, produced automatically.

The guide covers what to do. This covers what the tool does behind the scenes.
A template is created, using an example copy doc provided by the PM. Each text string must be replaced with a placeholder using variables listed in the different applicable content spreadsheets. These variables are surrounded in double curly brackets with no spaces before or after the variable:
{{MQ3/BTF/3/A/Eyebrow}}.- LocalizedCopy for ATF/BTF
- NonFigma for PDP titles and bullets
- Universal for comparison charts
{{placeholder}} token and then searches for the matching value in the variables column in each spreadsheet tab you select from the spreadsheets you provided in the tool. For each locale you select, the tool finds the corresponding column for that language and populates from the cells in the rows that correspond to the variable column.There is a function to select sections in the template that are conditional based on locale. Content marked with a named range is identified by the script and the tool populates a section identified by the the name assigned to the conditional section, where you can select what locales that component should be displaing in.
Currently the filename and the doc title are the same, so there is a single field. It is informed by the
{{doc-title}} variable at the top of the copy doc for the title, but it also populates the filename, appended by the locale code you select.All processing happens on TGD's secure server through Google's APIs; finished documents land in your chosen output folder, named with the locale suffix.
Sign in with Google
Before using the tool you authenticate with Google. You'll be redirected to sign in, then asked to approve access to Docs (read & copy documents), Sheets (read your data), and Drive (browse folders and save output).
You must use your TGD Google account to sign in.
Setting up the template
Your template is a Google Doc containing placeholders that get replaced with locale-specific content. The tool copies this template for each locale and performs the replacements.
Placeholder syntax
The script reads strings inside double curly braces as variables to swap out anywhere in the document, including tables and the page title.
Module 3: Feature carousel
Carousel Image 1: Batman
[Eyebrow] {{MQ3/BTF/3/A/Eyebrow}}
[Head] {{MQ3/BTF/3/A/Headline}}
[Sub] {{MQ3/BTF/3/A/Body}}
[Feature] {{MQ3/BTF/3/A/Feature}}
[Legal] {{MQ3/BTF/3/A/Legal}}

Carousel Image 2: Social gaming
[Eyebrow] {{MQ3/BTF/3/B/Eyebrow}}
[Head] {{MQ3/BTF/3/B/Headline}}
[Sub] {{MQ3/BTF/3/B/Body}}
[Legal] {{MQ3/BTF/3/B/Legal}}
- Placeholders are case-insensitive.
- Variables cannot include spaces.
- The special
{{doc-title}}placeholder populates both the document title and the filename, appended with the locale code(s) you select.
Prepare your template
- Open the copy doc example document and make a copy.
- Mark it as a template by adding
[TEMPLATE]at the beginning of the doc title. - Drop the new template doc in your template folder.
- The example copy doc defaults to en-US. The en-US column in the spreadsheet is what you will use for comparison.
Get your variables ready
- Open the content spreadsheets you need.
- Open a local instance of Excel.
- Here is the visible column layout of the spreadsheets:
Column C Column D [Hidden] Column E Variables String en-US The other visible columns represent the other locales.
- Select columns C and E and paste them into your local Excel. There is a hidden column in the middle with the heading Type; just delete that column.
- Open an instance of Copilot in Excel. Use this prompt (replace the column letter with whichever column has the variables from Column C in the spreadsheet):
In column A, remove any spaces before or after the strings in the cells, and surround them with double curly brackets.
Now you have copy/paste placeholder variables ready to go.
Tag the template
- For reference, open the appropriate Figma delivery file for en-US.
This helps when the order of variables in the spreadsheets does not match the order of strings in the example copy doc. - Place your template doc and the local Excel spreadsheet with the tagged variables side by side.
- Start replacing strings in the template with the variables (including the double curly brackets).
Conditional sections
Some content should appear only for specific locales: retailer blocks, region-only features, specific components. You mark that content with a named range so the tool only includes it in the appropriate copy docs.
Conditional sections are applied to individual copy doc templates as needed.
- Open your template, then Extensions › Apps Script.
- Delete any existing code and paste the script below.
function onOpen() { DocumentApp.getUi() .createMenu('Section Markers') .addItem('Mark Selection as Section', 'markSection') .addToUi(); } function markSection() { var doc = DocumentApp.getActiveDocument(); var selection = doc.getSelection(); if (!selection) { DocumentApp.getUi().alert('Please select the text to mark as a section.'); return; } var name = DocumentApp.getUi().prompt('Section Name', 'Enter section name (e.g. "best-buy"):', DocumentApp.getUi().ButtonSet.OK_CANCEL); if (name.getSelectedButton() !== DocumentApp.getUi().Button.OK) return; var sectionName = name.getResponseText().trim().toLowerCase(); var rangeBuilder = doc.newRange(); var els = selection.getRangeElements(); for (var i = 0; i < els.length; i++) { var el = els[i]; if (el.isPartial()) { rangeBuilder.addElement(el.getElement(), el.getStartOffset(), el.getEndOffsetInclusive()); } else { rangeBuilder.addElement(el.getElement()); } } doc.addNamedRange('SECTION_' + sectionName, rangeBuilder.build()); DocumentApp.getUi().alert('Created named range: SECTION_' + sectionName); } - Save, choose
onOpenand Run, then you will have to authorize. - Reload the Doc. A Section Markers menu appears.

Creating the conditional sections in the doc
- Consult the Asana task for what components should and should not display in generated docs. For instance, es-MX does not get gift card modules.
- Select the section that will be conditional. Be sure to select the line break after it, so that when that section is removed, you don't end up with an extra line break when it's gone.
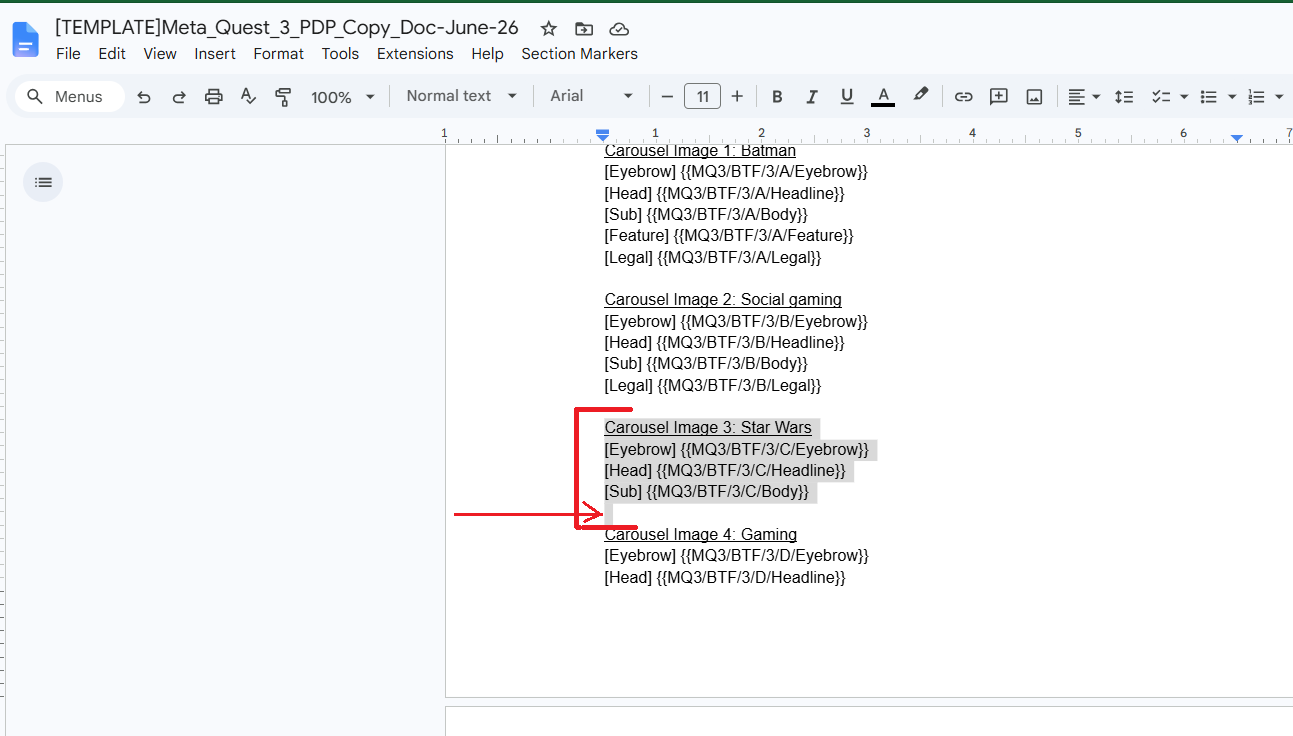
- When you choose "Mark selection as section", the script you added to the template will begin running. You will have to authorize again.
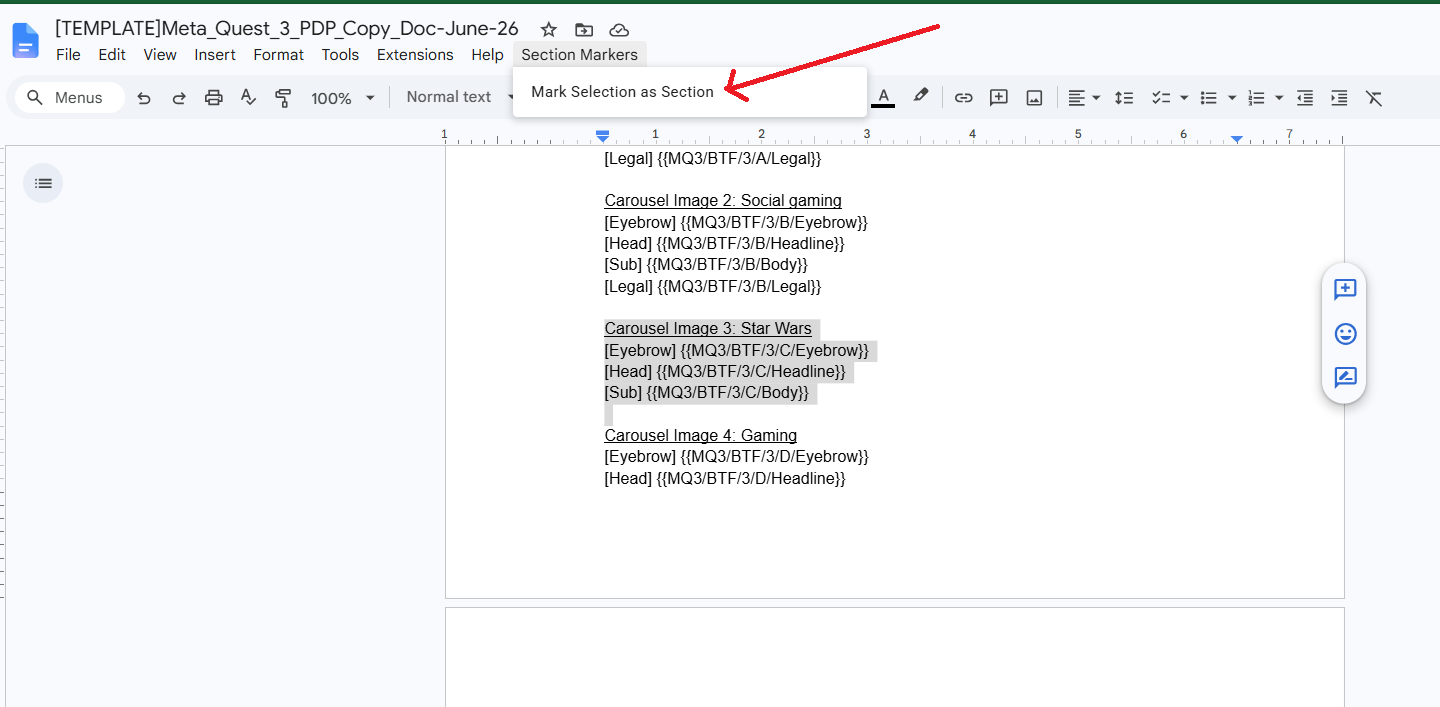
- You will be prompted to name the section. Do not include spaces, keep them simple but readable. Use dashes or underscores.
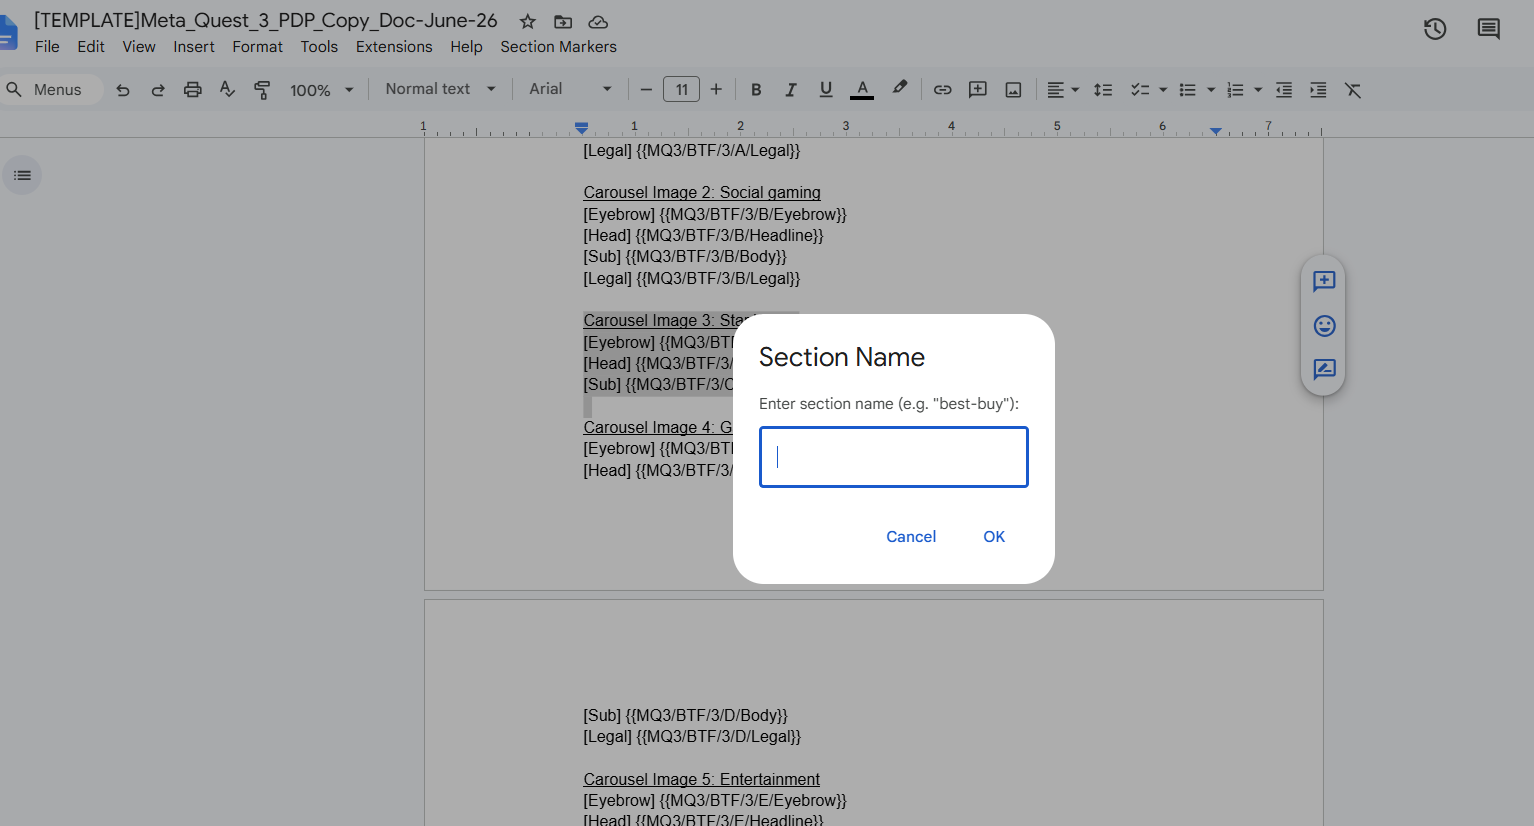
- Click OK
When the tool runs, it will search your template for conditional sections, and you will be able to select what locales those sections will appear in. You can have multiple conditional sections in a single copy doc template.
best-buy).The content spreadsheets
Your spreadsheet maps each variable name to its value in every locale. Variable names live in column C; each locale gets its own column to the right starting with en-US in column E. On the spreadsheet, the locale codes will appear in the header of each column.
Notes on the spreadsheets
- Be sure you are using the most current version. Consult the Asana task description.
- The spreadsheets must be Google Sheets. If they are Excel sheets, they must be converted to Sheets before they can be used.
- You have two options for adding the spreadsheets: you can copy the URL for each spreadsheet into the tool, or if you have all your spreadsheets in one folder, you can provide the URL for that folder in the tool, and then the tool will allow you to select the spreadsheets you want to use.

Using the tool
Step by step instructions.
The overview: Load, select, generate
- Open the tool
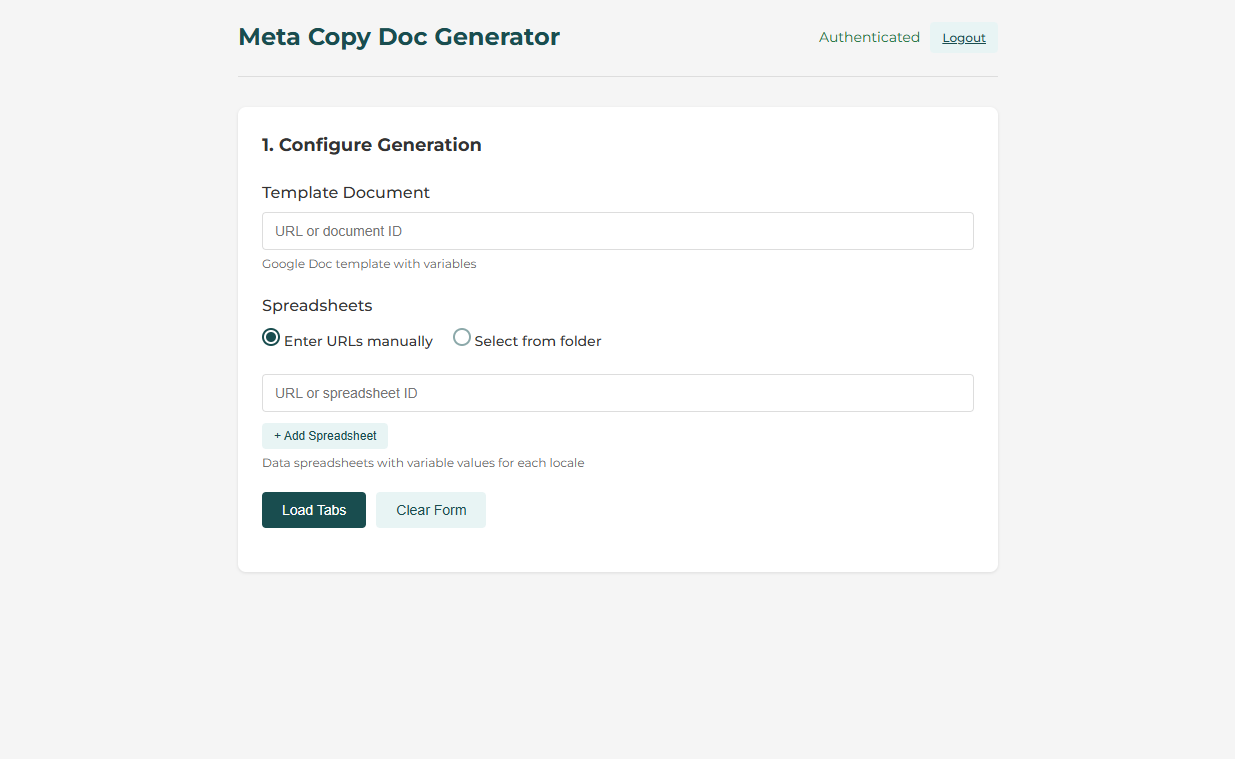
Initial screen - Copy the template URL into the Template Document field
- Under Spreadsheets you have two options to add the spreadsheets you need for the copy docs:
- Enter URLs manually: Add the URLs in the URL or spreadsheet ID, adding new fields as needed with the + Add Spreadsheet button
- Select from folder: If all your spreadsheets are in the same folder, you can add the URL for the folder and when you click Load all spreadsheets present in that folder will be listed with checkboxes to select the ones you need.
- Once you have selected your spreadsheet URLs, click Load tabs.
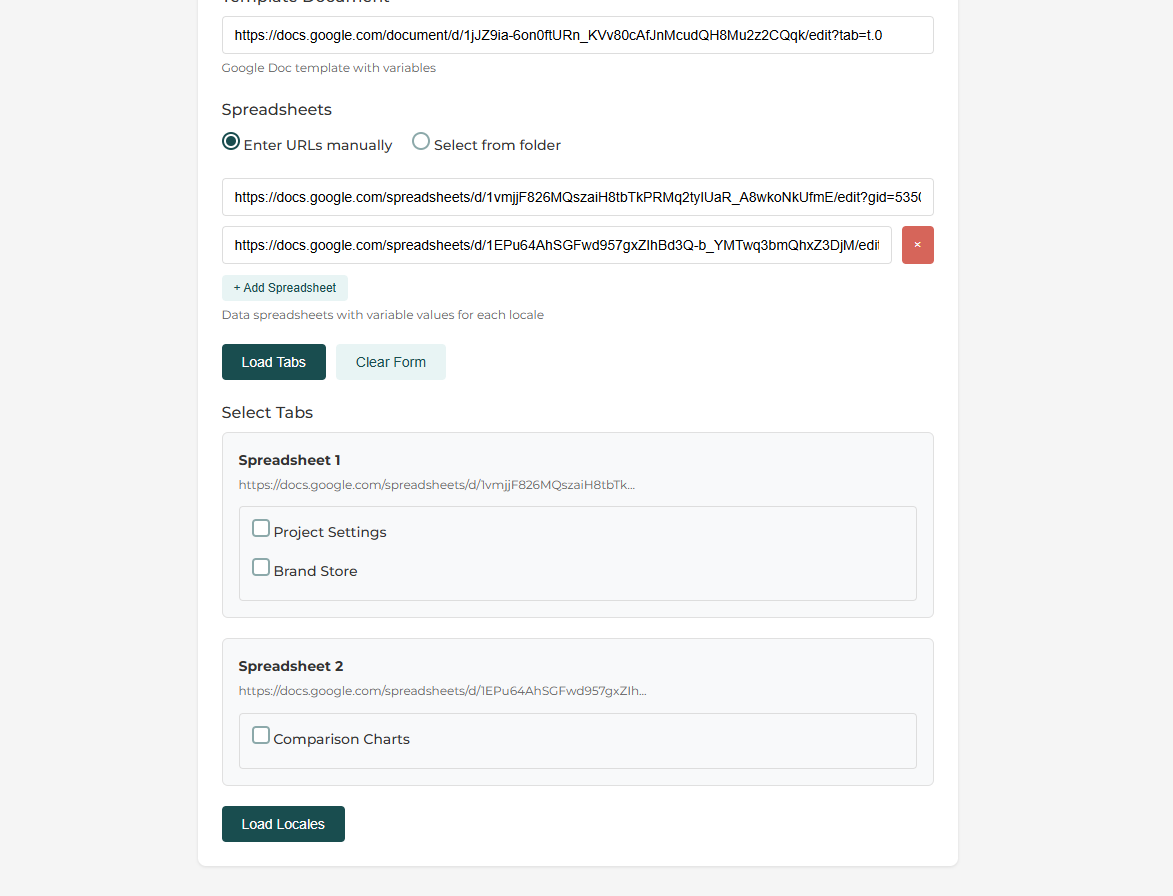
Select tabs screen - The tabs for each spreadsheet will be loaded with checkboxes. Check the tabs that are relevant to the copy doc you are generating. Click Load Locales
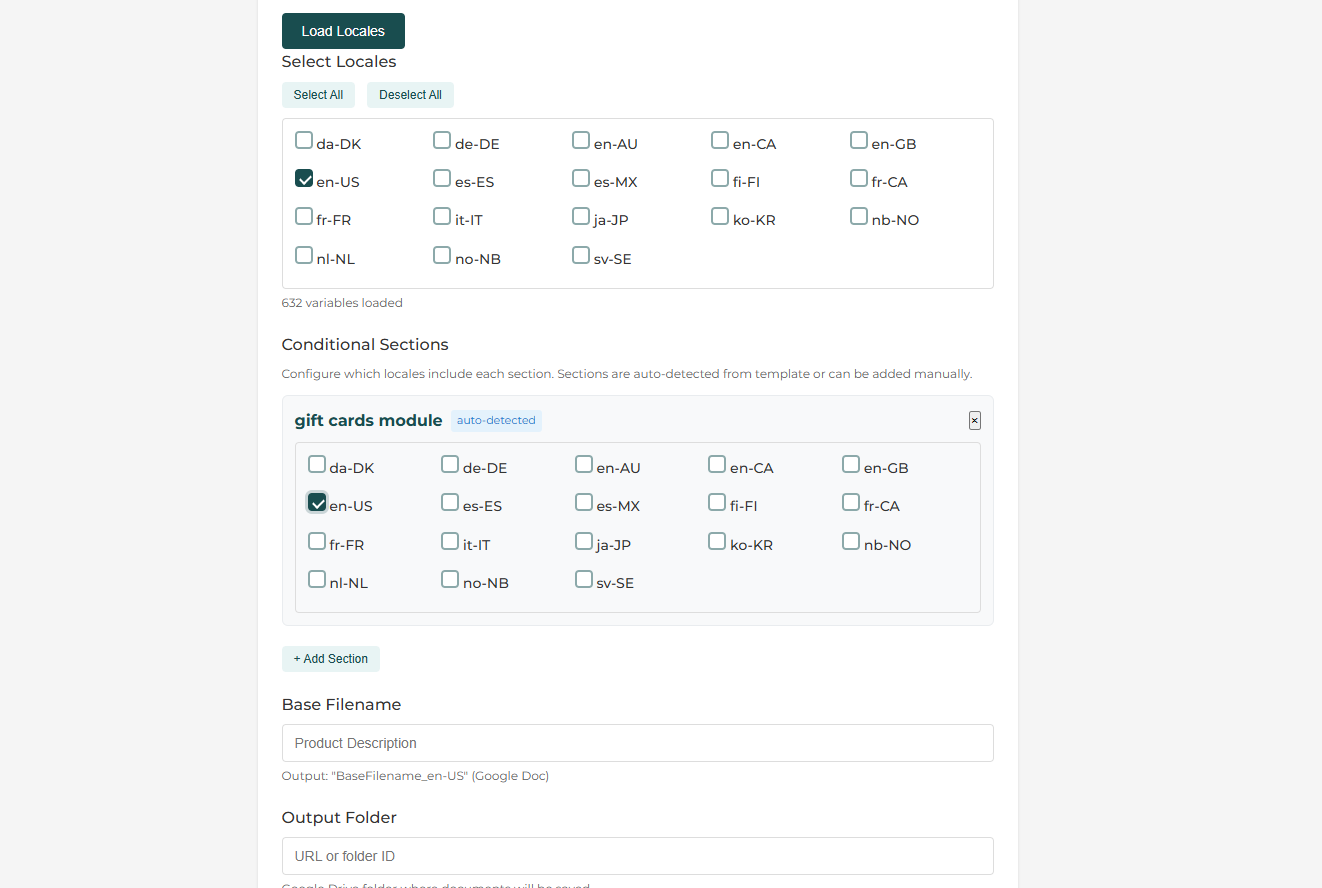
Select locales screen - The tool will identify all the language columns included in the spreadsheets. It will not identify if the columns are populated.
Select all the locales you want to generate copy docs for. - Conditional Sections: If there are conditional sections marked in the template, they will display here. Check any locale where the named section SHOULD DISPLAY. Any locales not marked will NOT display that section.
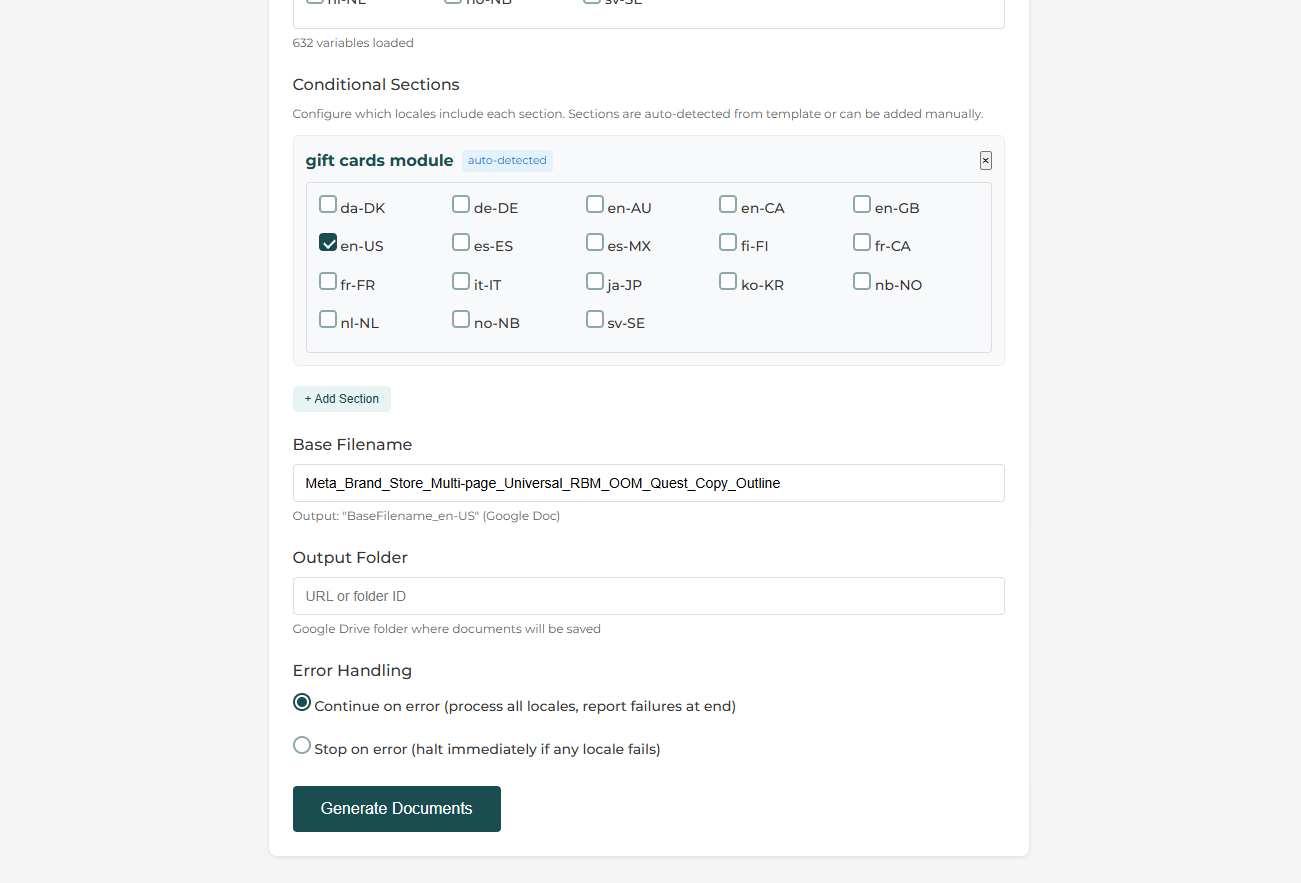
Add base filename/doc title and output folder location - Base Filename: The filename and the document title are the same, so this field informs both those things. Find the expected base filename in the spec sheet listed in the task description. Put it in this field, without the underscore or lang-CNTRY.
- Output Folder: Add the URL of the folder location where you want this to populate.
- To generate, click Generate Documents. It can take a minute for them to populate in the output folder. Sometimes reloading the folder page helps.
- Once the docs are generated, you will have the option to Generate More and Clear Form.
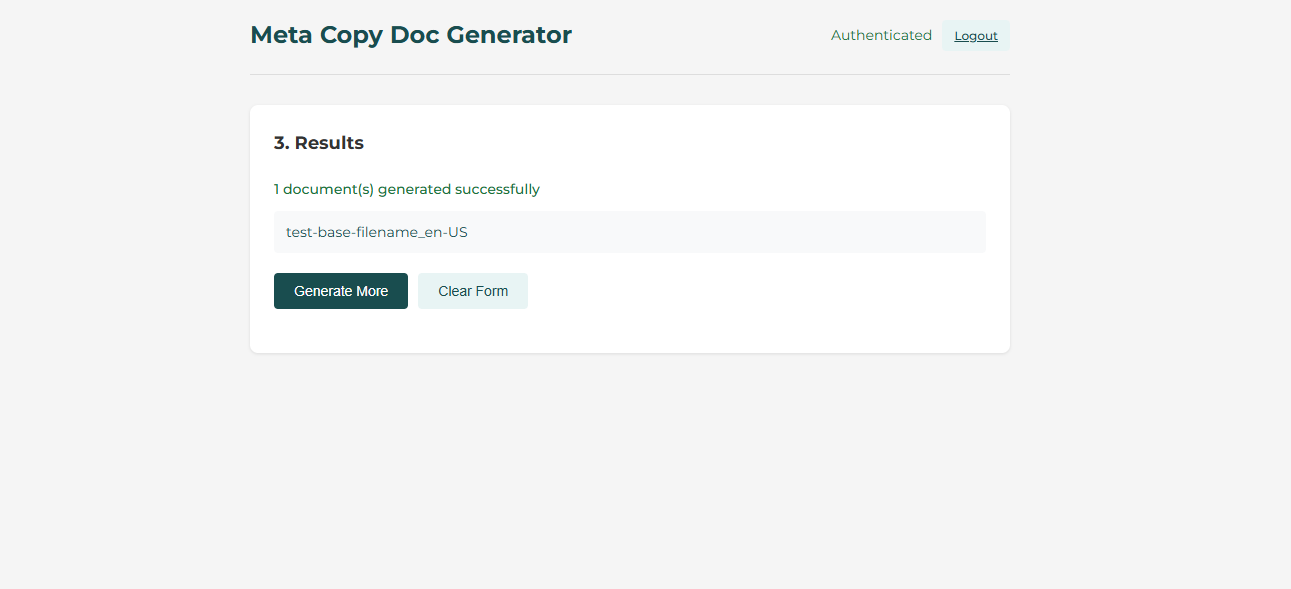
Results screen
Understanding results
A progress bar fills as each locale is processed (you can Cancel; already-generated docs are kept). When it finishes, results split into two lists.
Files are named {base-filename}_{locale}, e.g. Product Sheet_en-US, Product Sheet_fr-CA. Use Generate More to keep your settings, or Clear Form to start fresh.
Troubleshooting
- Clear your browser cookies for the application domain.
- Navigate directly to the app URL to trigger re-authentication.
- Make sure your Google organization allows the required API scopes.
- Sign out and back in if the option is available.
- You need at least view access to the template and spreadsheets.
- You need edit access to the output folder (to create documents).
- For Shared Drive items, confirm they are not restricted to other users.
- Open the item directly in your browser to verify access.
- The variable name in your sheet must match the placeholder (case-insensitive).
- No spaces inside the braces:
{{name}}not{{ name }}. - Confirm the locale column has a value for that variable.
- Check that you selected the correct tab(s) when loading locales.
- If a variable appears in multiple tabs, the last loaded value wins.
- Check your selected tabs for conflicting data.
- Organize variables so each one appears in only one tab.
- Verify the variable count shown after loading matches expectations.
- Confirm the section is marked in the template (check named ranges).
- The section name in the tool must match the marked name.
- Mark complete elements, not partial content.
- Re-load the template URL if the section is missing from the panel.
- Uploaded .docx files are not supported.
- Open the .docx in Drive, then File › Save as Google Docs.
- Use the new Google Docs URL as your template.
- Re-mark conditional sections after converting.
- Generation logs are written to
generation.logon the server. - Contact your administrator for access to server-side logs.
- UI error messages often contain the key detail about what failed.